A Step-by-Step Guide: Replacing the Fuser on Your HP Printer
The fuser unit in a printer plays a crucial role in the final stages of the printing process, ensuring that the toner adheres to the paper. Over time, the fuser may wear out, leading to print quality issues or error messages. In this blog, we'll walk you through the process of replacing the fuser on an HP printer, providing step-by-step guidance to help you maintain optimal printing performance.
Step 1: Gather Your Materials
Before you begin, make sure you have the following materials:
- Replacement fuser unit compatible with your HP printer mode.
- Gloves for protection.
- Power off your printer and unplug it from the electrical outlet for safety.
Step 2: Identify Your HP Printer Model
Different HP printer models may have slightly different fuser replacement procedures. Refer to your printer's user manual or documentation to identify the specific model and obtain the correct replacement fuser.
Step 3: Access the Fuser Compartment
- Open the printer's top cover or front door to access the fuser compartment. Refer to your printer manual for guidance on how to open the specific compartment.
Step 4: Remove the Old Fuser Unit
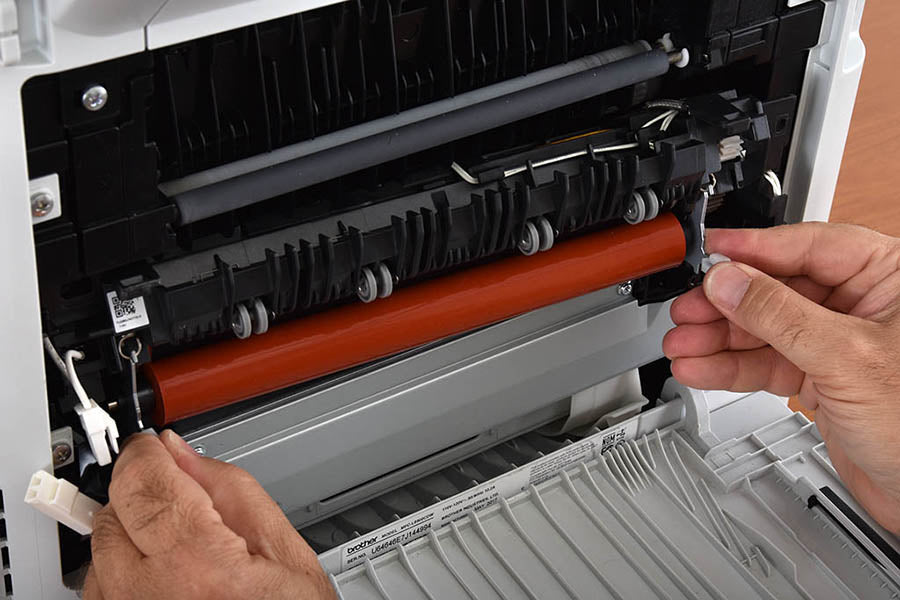
- Locate the fuser unit inside the printer. It is typically a cylindrical component near the back of the printer.
- Depending on your HP printer model, you may need to release latches, press buttons, or follow specific instructions to unlock and remove the old fuser. Consult your printer manual for detailed guidance.
- Carefully grasp the fuser unit by its handles and pull it out of the printer.
Step 5: Install the New Fuser Unit
- Unbox the new fuser unit and remove any protective packaging.
- Align the new fuser with the tracks inside the printer and gently slide it into place. Ensure that it securely clicks into position.
- Follow any specific instructions provided by HP for securing the new fuser in place. This may involve latches, buttons, or other locking mechanisms.
Step 6: Close the Printer Cover or Door
- Close the printer's top cover or front door securely.
Step 7: Power On the Printer
- Plug your printer back into the electrical outlet.
- Turn on the printer and allow it to go through any initialization or calibration processes.
Step 8: Test the Printer
- Print a test page to ensure that the new fuser is installed correctly and that the print quality meets your expectations.
Congratulations! You have successfully replaced the fuser on your HP printer. If you encounter any difficulties during the process, refer to your printer's user manual or consult HP's support resources for additional guidance. Regular maintenance, including fuser replacement when necessary, ensures that your printer continues to deliver high-quality prints over time.


